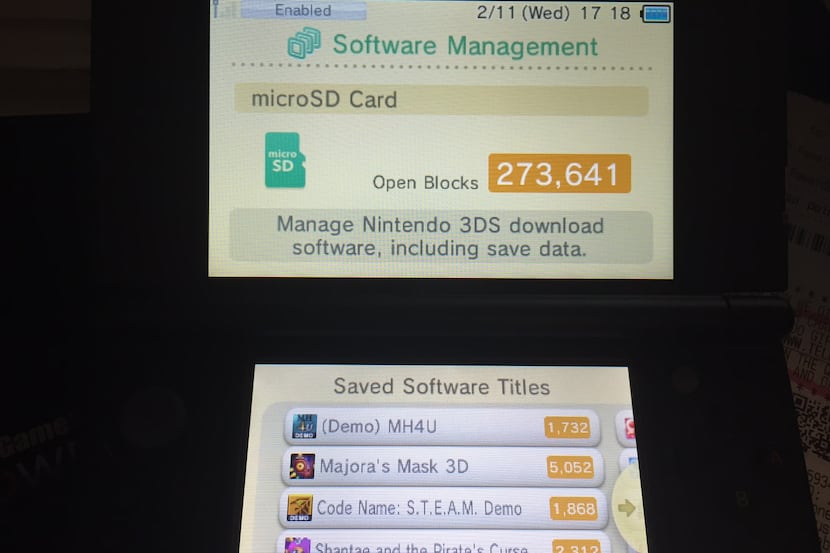
The New Nintendo 3DS XL comes out on Friday. I like it a lot. But the basic 4GB microSDHC the system comes with won't cut it for someone who wants to go digital with most of the gaming library. If you're going to be downloading games like The Legend of Zelda: Majora's Mask 3D and Codename S.T.E.A.M. and keeping them on your system, you'll want more space eventually. Might as well get it when upgrading to the new system.
I used a 32GB SD card on my old 3DS, which is the largest size Nintendo officially supports. That size should work fine for most people. But for me, that card eventually got full, so when moving to the New Nintendo 3DS XL, since I needed to invest in a new microSD card anyway, I decided to go bigger. 64GB, specifically.
After spending a bunch of time on places like Reddit trying to make sure a high capacity card would actually work in the New 3DS, I decided to take the plunge and can happily report that, yes, a 64GB microSD card totally works. It takes a couple extra steps, but you can sidestep Nintendo's suggestions for SD cards and enjoy a lot more space without much hassle.
First, though, let's go over the easier and more practical SD card transfer process. Nintendo actually outlines most of it in an official video:
Backing up the old SD card data
If you're upgrading from an older 3DS (or just moving to a bigger SD card), you're going to need to back up the data from your old SD card. Thankfully, Nintendo makes this extremely simple. Unless you want to do it wirelessly on the New 3DS — a process that can take a very long time — you just need to plug the SD card into your computer.
All you'll need is a PC with either a built-in SD card slot (many modern laptops have them) or a USB SD card reader (I've used this one for awhile, and it works wonderfully).
Take the SD card out of your 3DS (you should probably make sure the 3DS is off, first) and plug it in. As soon as you do, you’ll most likely get a popup window asking you what you want to do.

Click "Open folder to view files," or find the SD card under My Computer, and you'll see two folders: One named "Nintendo 3DS" and another named "DCIM."
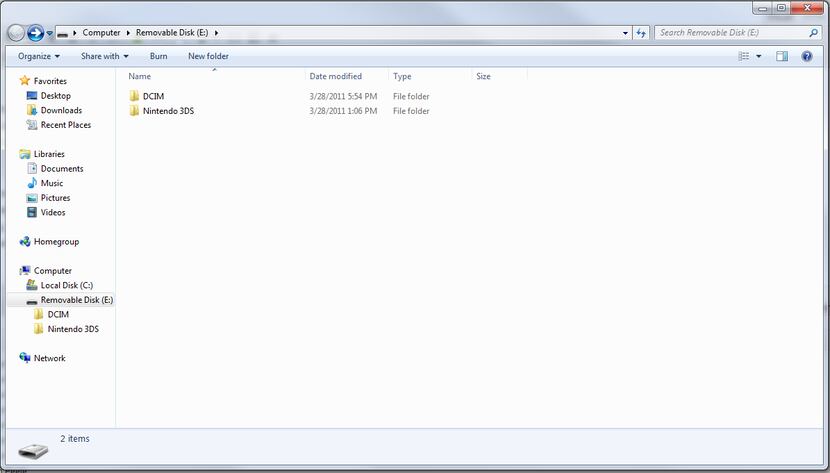
Copy both of these folders onto your computer. I personally did it in a folder called "3DS Backup" with the day's date attached.
When that’s done, safely remove the old SD card. Then, all you have to do is paste those two folders (not just their contents — the entire folders) into the new SD card. If you’re also transferring to a new 3DS model, follow the steps in the built-in 3DS System Transfer utility. If all you’re doing is changing SD cards, then you’re good to go. Enjoy!
For experts and crazy people: Using high capacity SD/microSD cards on the 3DS:
Since cards higher than 32GB aren't officially supported by Nintendo, you may not want to do this if you're prone to needing technical support. It shouldn't be a problem — we're not doing anything here that should damage your 3DS. But if you're the worrying sort, maybe just stick to 32GB to be on the safe side. Frankly, that should be more than enough space for most people's needs anyway.
But if you’re crazy like me, here’s how to get more space:
First you'll need the new card itself. I ordered this 64GB SDXC card on Amazon, but most should work. Just remember that it needs to be MicroSD for the New 3DS XL. Regular SD cards work in older 3DS models, as do MicroSD cards with an adapter (which most seem to come with).
When you have it, plug it into your PC. We need to reformat it to the FAT32 file format so the 3DS can properly recognize it. Assuming it’s a brand new card it shouldn’t have any data on it yet, but if it’s an old card you’re re-purposing, make sure you get all the data off and backed up before you go further. Reformatting it will wipe it clean.
You'll need a program like MiniTool Partition Wizard. Other programs like SDformatter won't let you specify that you want FAT32 when formatting, which is why I settled on MiniTool, but there are probably still other options out there (including ones for Mac and Linux).
Start it up when you have the SD card plugged in, and you should see a screen like this:
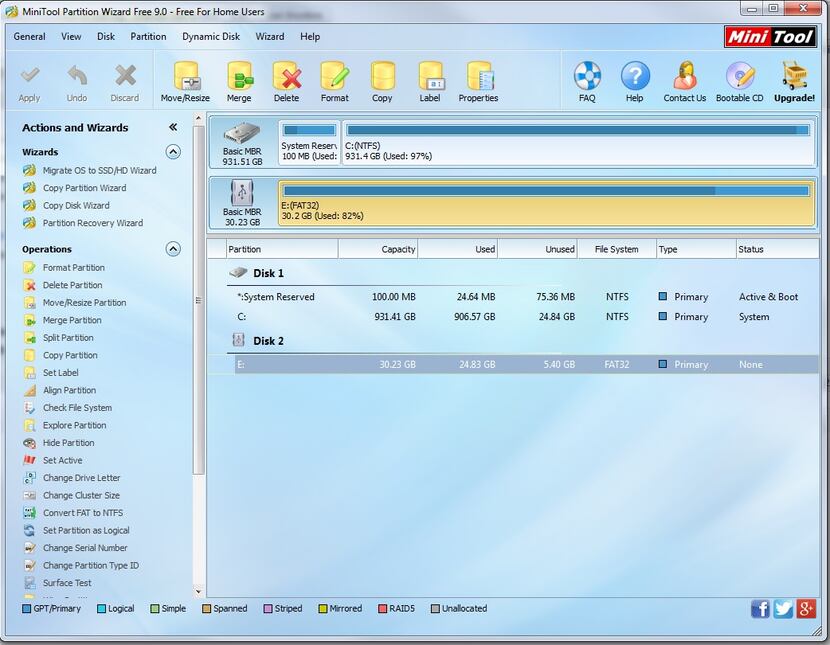
I've got my older, already formatted SD card in the card slot right now, but it's nonetheless highlighted so you can see where the option would be.
Make absolutely, 100 percent sure you select the SD card for the next steps, otherwise you might start screwing with your computer’s hard drive.
You can right-click on the SD card and select “Format,” after which you’ll get another screen asking you for specifics (on a completely fresh card, the option may say something like “Partition” instead of “Format”):

You have enough characters to go ahead and name the Partition Label "Nintendo3DS" (though I don't think this really matters). Make sure the File System is set to "FAT32″ and the Cluster Size is set to "32KB." If it asks, you also want to make sure it's set as the "Primary" partition. Hit OK (again, make sure you've got the SD card selected, not something else) and let it run.
Once it’s done, follow the steps above to copy and paste your old 3DS SD card data onto the newly formatted card. Then toss it into your 3DS and voila! More space than you will probably ever need.